 If you wandered here from Pinterest or Google thinking this is going to be on of those beautifully professional tutorials, complete with Instagram worthy pictures and step by step instructions…
I am so sorry, Dude.
I am writing about a crafting project I did with the family because I thought it was really cool, but in true Angel Who Swears fashion, I did not document it properly. I didn’t even think about blogging it until we were almost done.
You probably won’t learn much from this, but on the flip side, maybe you’ll giggle at my ineptitude. And if you’re a blogger, you can leave here feeling terribly superior.
So it’s no secret The Husband Dude and I LOVE Halloween.
That’s probably an understatement.
Thanksgiving and Christmas are really just eating holidays for us. Halloween is where we go all out and decorate and dress up and watch scary movies and stuff ourselves with candy corn and mallow crème pumpkins.
Ok, that last part is just me, but suffice it to say, WE LURVE LURVE LURVE HALLOWEEN!
Now that we’ve got grandkids and they are getting big enough to participate in more and more activities, I thought it would be fun to start a tradition around our favorite holiday. I decided the kiddos should all come to Mimi and Pappy’s house and take part in some Halloween activity.
I scoured Pinterest but I mostly just found things that were too advanced or that would involve glitter in all or our cracks and crevices.
Of our house.
What did you think I meant?
Freaks.

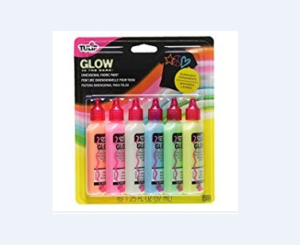
Anyway, our daughter, Kim found a cute activity involving painting craft pumpkins with glow in the dark paint and that seemed like a good fit for us.
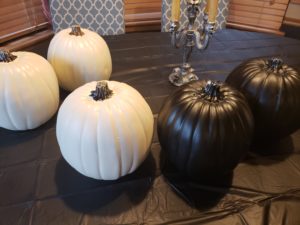
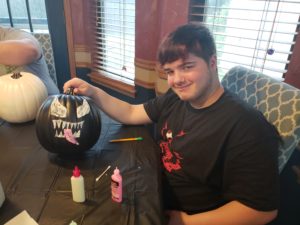
So I headed to my nearest Michael’s because even though it’s only mid-October, all of their Fall stuff is on sale for like 60% off. I snagged a couple of black pumpkins for Shane and THD and white for the rest of us. I wanted black too, but there were only two left and I’m not a totally selfish Mom so I let Shane have the black one.
Besides, I ate the last package of his peanut butter crackers that he loves so much, so I was feeling some Mom guilt.
Of course, one does not go to the craft store and just purchase exactly what is needed. I had to walk around looking at the deals and $116 later I walked away with a cart full of stuff that was 60% off but was probably 85% overpriced to begin with. It’s like Vegas. The House always wins.
I got the paint on Amazon, but you can probably find it in the craft store as well. It’s just glow in the dark “puff” paint that can be used on fabric.
So let’s get started.
Angel Who Swears Really Bad Pumpkin Painting Tutorial
What You Need:
Black or White Craft Pumpkins (Any size)
Glow in the dark puff paint in different colors
A disposable table cloth or cover. Unless you want your forty year old dining table to glow in the dark.
Towels to cover your dining chairs with. Unless you want your upholstered dining chairs to glow in the dark.
I prefer old Spiderman towels that the teenager is now too old to use.
Rhinestones and jewels with the sticky backs.
Because you have granddaughters. And bling makes everything better.
A pencil, if you need to draw out your design before painting it.
Paper towels and cotton swabs.
A bottle of your favorite wine or liquor. Trust me on this.
Preparation
Step One:
Ask The Husband Dude and the teenager to put the leaves in the table. Ask three times. Get really grouchy until it’s done.
Step Two:
Cover your table with the plastic tablecloth. Spend the next thirty minutes getting it even on all sides because you have O.C.D. Start over again when the cat jumps on the table and makes the cloth crooked.
Step Three:
Cover the chairs where the grandkids will sit with towels. Argue with the three year old about why she has to sit on a Spiderman towel and why you don’t have “P.J. Masks” towels.
Step Four:
Eyeball the wine on the kitchen counter.
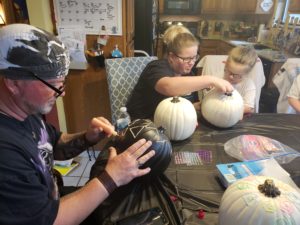
Painting The Pumpkins
Step One:
Draw out the design on your pumpkin, unless you want to just freehand it. Show off.
Step Two:
Start painting your design.
Step Three:
Get a massive glob of paint all over your pumpkin, your fingers and the sleeve of your shirt.
Step Four:
Say, “Oh fuck!”
Step Five:
Remember that your grandkids are in the room and apologize: “Oh, fuck, I’m sorry! Mimi shouldn’t have said that!”
Step Six:
Realize you did it again. Apologize again. This time, without cussing.
Step Seven:
Take a selfie.

Step Eight:
Say, “Don’t touch that!” about a million times for the next four hours until the pumpkins dry.
Clean Up
Step One:
Pick up the plastic table cloth off the table, wrap it up and throw it away. Pat yourself on the back for getting it 65% off at the craft store.
Step Two:
Wipe the table down. Find sticky rhinestones stuck to the table, the chairs and the kitchen floor.
Step Three:
Pour yourself a glass of wine. Sit down on the couch. Realize you just sat on a rhinestone.
Step Four:
Pick up the remote control to the T.V. Find another rhinestone.
Step Five:
Remember that there’s a sink full of dirty dishes. Get up to load the dishwasher. Find a rhinestone in one of the grandkid’s bowls.
Step Six:
Three days later…still finding rhinestones. Where’s that bottle of wine?

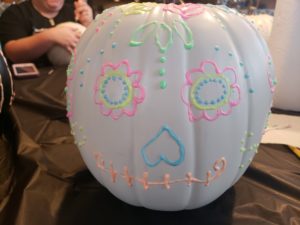
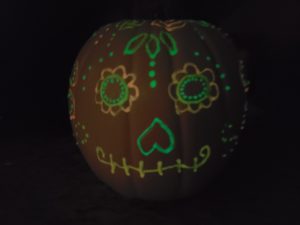
I told you this was a bad tutorial. Here’s my finished pumpkin:
Stay weird, my friends. Normal is boring!
 Judy says
October 19, 2018 at 6:39 amWhat a wonderful family activity and a blessing for you to share with all of your readers!!! Your granddaughters will always have great memories of MiMi, Pappy & Uncle Shane.
 Kat says
October 19, 2018 at 10:25 pmThank you, Judy! I miss you!
 mydangblog says
October 19, 2018 at 8:48 amI think they look great—everyone looks like they’re having a lot of fun. This was a really great post—love your humour 😊
 Kat says
October 19, 2018 at 10:26 pmThank you! We did have fun!